
Introduction to Homemade Cream Puffs
Why Homemade Cream Puffs Are a Game Changer for Young Professionals
If you’re a young professional navigating the hustle of day-to-day life, finding quick yet impressive desserts can feel daunting. Enter homemade cream puffs! These delightful treats not only impress your friends but also offer a sweet escape from the rigors of daily routines. With a prep time of just 30 minutes, you can whip up a show-stopping dessert that feels gourmet.
What makes these cream puffs truly special is their versatility. You can fill them with whipped cream, custard, or even a fruity mousse, depending on your mood. Plus, the satisfaction of creating airy, golden shells from scratch is an experience like no other. As a bonus, these creations are an excellent conversation starter—imagine sharing your process or the joy of baking them with friends.
For those busy evenings or spontaneous gatherings, homemade cream puffs allow you to showcase your culinary skills without overwhelming your schedule. Not only will they please the palate, but they’ll also elevate your dessert game, making every bite a moment of joy. Intrigued? Let’s get to the recipe that’ll leave everyone asking for seconds!
Ingredients for Homemade Cream Puffs
Creating homemade cream puffs requires just a handful of ingredients, ensuring every bite delivers delightful textures and flavors.
Pâte à Choux Components
To whip up the perfect choux pastry, you’ll need:
- 1 ¼ cup water
- 1 teaspoon granulated sugar
- ½ teaspoon kosher salt
- ½ cup unsalted butter
- 1 cup all-purpose flour
- 4 large eggs
These ingredients come together to form a light and airy shell that is the foundation of your cream puffs. The key is combining the flour and water mixture properly; for detailed technique, check out this guide on pâte à choux.
Whipped Cream Essentials
For the luscious filling, gather:
- 2 cups heavy whipping cream
- ½ cup powdered sugar
- 1 teaspoon pure vanilla extract
This mixture of rich cream and a touch of sugar creates the light fluffiness that perfectly complements the crispy shell.
Special Equipment Needed
You’ll also need some key tools to make the process smoother:
- Stand mixer
- Cooling rack
- Pastry bag
- Plain and star pastry tips
Having these handy makes piping and assembling your homemade cream puffs a breeze! Don't forget to have fun—it’s all about creating something delicious to share.
Preparing Homemade Cream Puffs
Creating homemade cream puffs is a delightful experience, perfect for impressing friends and family. The combination of crispy pastry and a luscious filling is simply irresistible. Here’s a step-by-step guide to help you master this delicious French classic!
Preheat the oven and set up your workspace
First, ensure your oven is primed for baking. Set the oven to 425°F (218ºC) and position the racks to the upper-middle and lower-middle. While the oven warms up, gather your ingredients and equipment—having everything at hand makes the process smoother. Line two baking sheets with parchment paper to prevent sticking.
Construct the choux pastry dough
The magic begins with the choux pastry! In a large saucepan, combine 1 cup of water, sugar, salt, and butter, bringing it to a boil over medium-high heat. Once the butter melts, add the flour. Stir vigorously—it may seem tough at first, but this step is crucial for developing structure. Cook until the dough pulls away from the sides of the saucepan and forms a ball.
Cool the dough before adding eggs
To avoid cooking the eggs, it’s essential to cool the dough slightly before mixing. Transfer it to a stand mixer, set it to low speed, and let it cool until it’s around 130°F (54ºC). This ensures a smooth incorporation of the eggs, yielding a shiny, smooth dough.
Pipe the dough onto baking sheets
Time to get piping! Fit a pastry bag with a large plain tip and fill it with the dough. Pipe out 2-inch rounds on the prepared sheets, leaving enough space for them to expand. A little trick: if you have any tails on your piped dough, dip your fingers in water and gently smooth them down for a sleek finish.
Execute the gradual baking method
This is where patience pays off. Bake your puffs, beginning at 425°F, then gradually lower the temperature in stages down to 200°F. Remember, opening the oven door is a big no-no! This gradual process helps the pastries rise perfectly. After about 60-70 minutes, they should be golden and airy.
Prepare the whipped cream filling
Next up, the star of the show: the whipped cream filling. In a stand mixer, combine heavy cream, powdered sugar, and vanilla extract. Whip it until soft peaks form—this adds sweetness and richness to balance the crispy shells beautifully.
Assemble the cream puffs
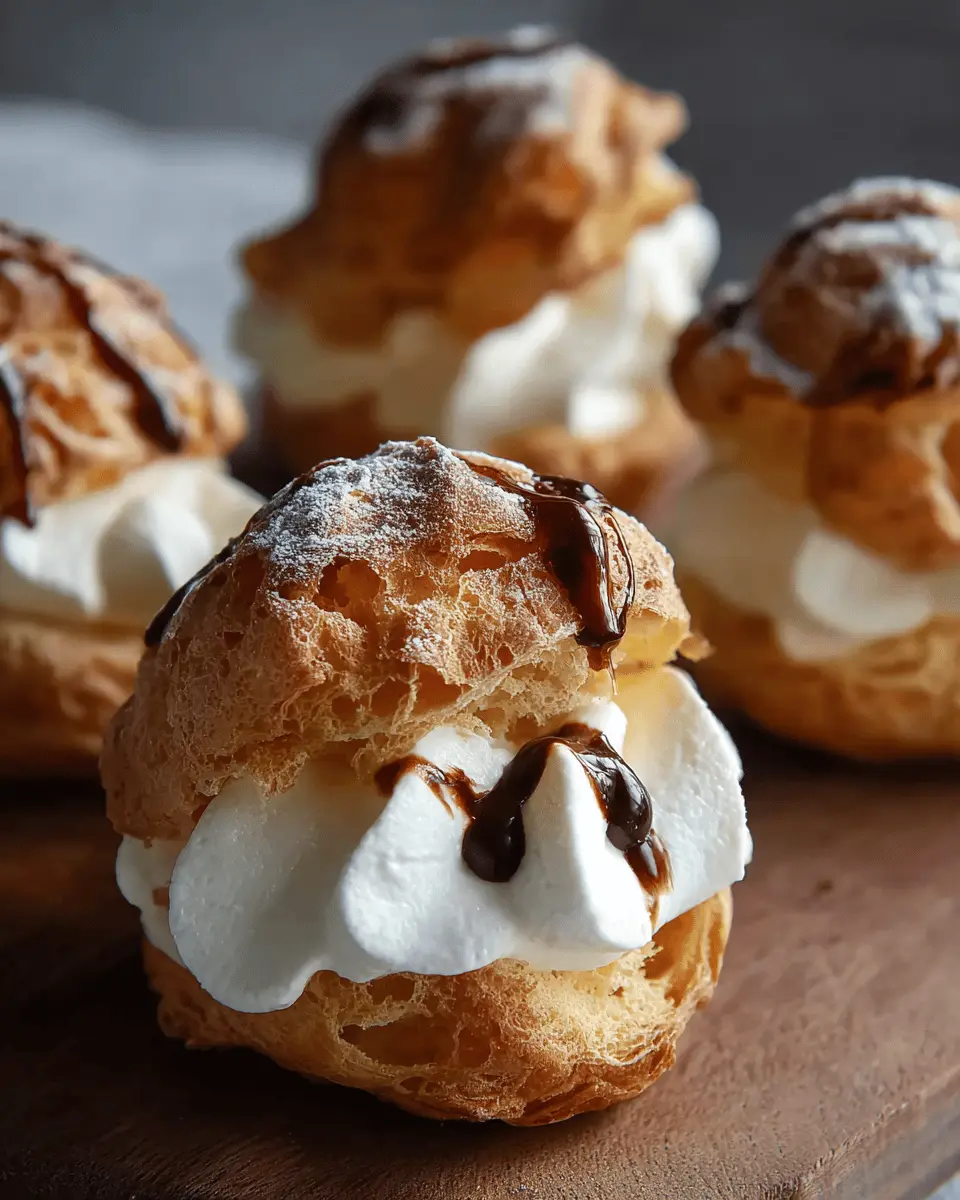
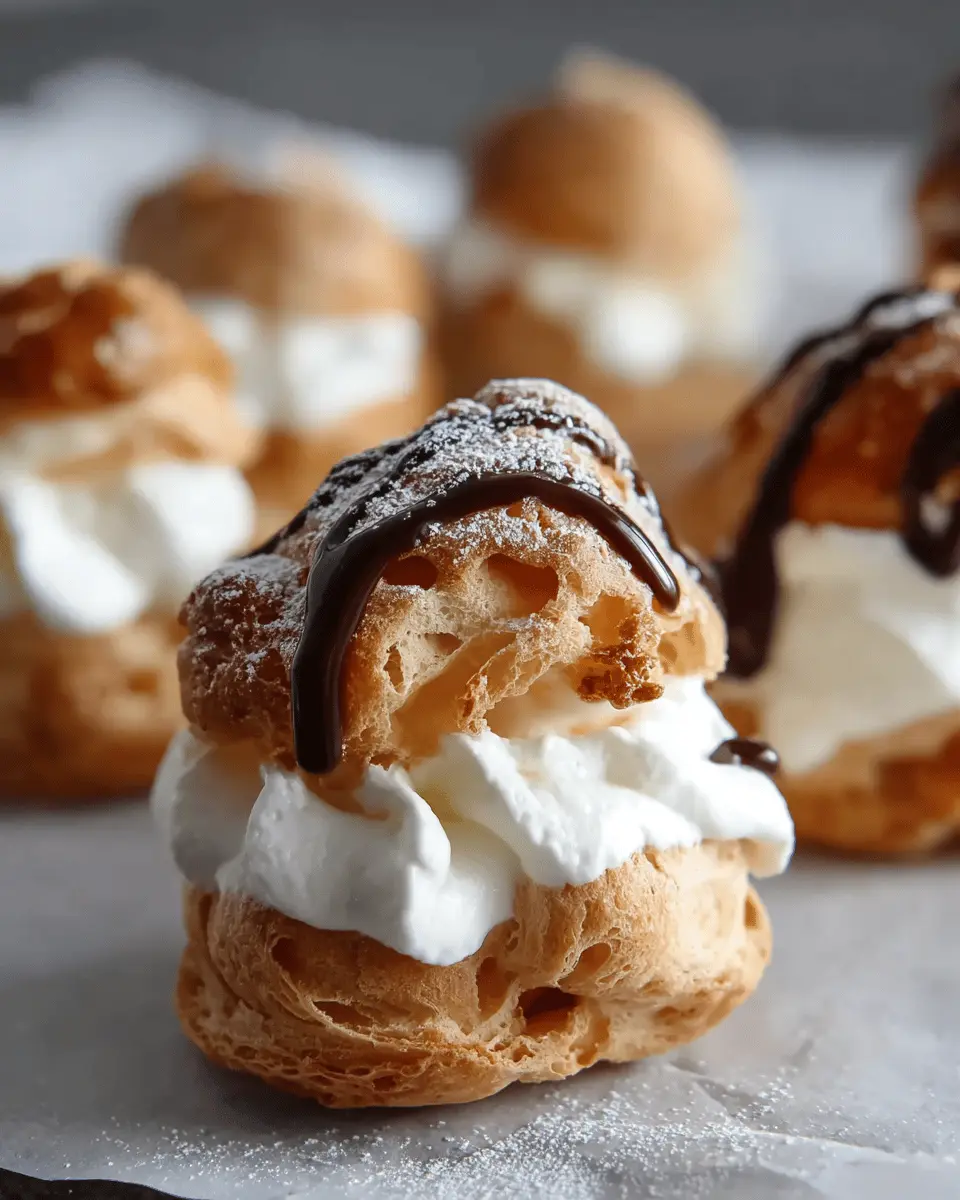
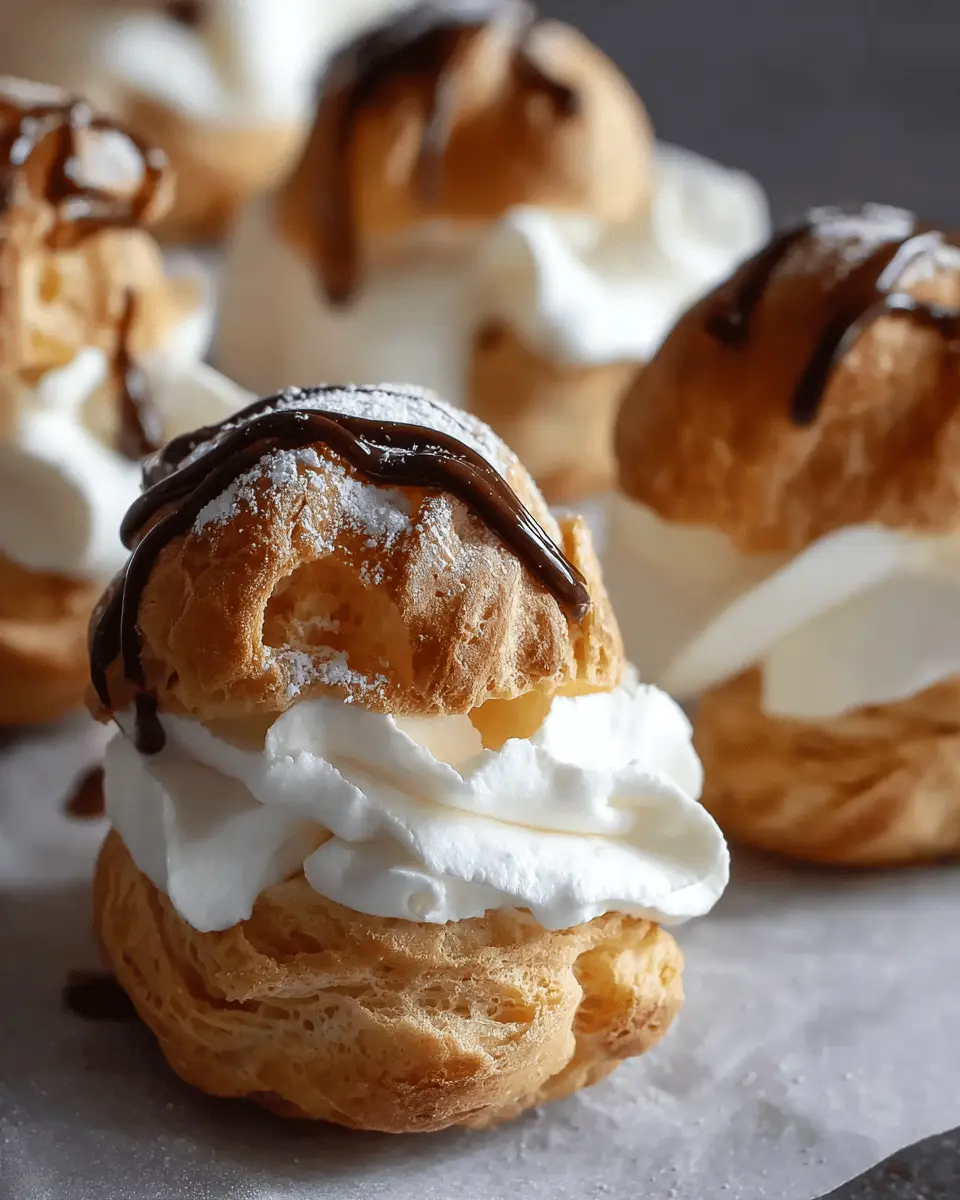
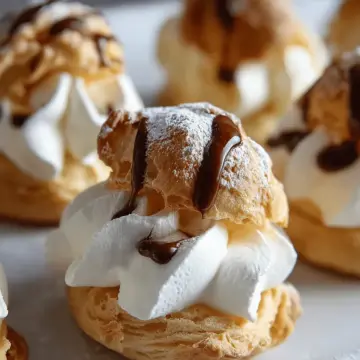
Once the pastry shells are cool, slice them in half using a serrated knife. Pipe the whipped cream into the bottom halves, then gently place the tops back on. Don't be shy with that filling—every bite should be a burst of creaminess!
Final presentation with powdered sugar
For that finishing touch, dust your homemade cream puffs with powdered sugar just before serving. Not only does it enhance the sweetness, but it also gives them that professional look. These elegant treats are best served fresh, but if you need to store them, keep them in the fridge.
By following these steps, you’ll be well on your way to impressing your guests with beautiful, delicious homemade cream puffs! Enjoy the process and happy baking!
Variations on Homemade Cream Puffs
Chocolate Cream-Filled Puffs
For a decadent twist on traditional homemade cream puffs, try filling them with rich chocolate cream. Simply melt semi-sweet chocolate and fold it into your whipped cream. This luxurious filling adds a delightful depth of flavor and will satisfy any chocolate lover. For an even more indulgent treat, consider drizzling some chocolate ganache on top!
Fruit-Flavored Cream Puffs
Looking for something fruity and refreshing? Make fruit-flavored cream puffs by adding pureed fruits such as strawberries, raspberries, or even mango into your whipped cream. This vibrant option not only looks appealing but also provides a seasonal burst that brightens up the classic cream puff. Don't forget to garnish with fresh fruit pieces for an eye-catching presentation!
Explore more variations, and turn your cream puff creations into a delightful showcase for any gathering!
Cooking Tips and Notes for Homemade Cream Puffs
Measuring Flour Accurately for Best Results
For homemade cream puffs, measuring flour correctly is crucial to achieving that light, airy texture. Use the “spoon and level” method: scoop flour into your measuring cup without packing it down, then level the top with a knife. This simple step ensures you don’t accidentally add too much flour, keeping your cream puffs perfectly delicate.
Storing Unfilled Cream Puff Shells
To keep your shells fresh, store unfilled cream puff shells in an airtight container at room temperature for up to 5 days. If you want to extend their shelf life, freeze them for up to a month. Just make sure they’re fully cooled before storage.
Re-Crisping the Shells If Needed
If you find your cream puff shells have lost some crispness, don’t worry! Re-crisp them by placing the shells in a preheated oven at 300°F (149°C) for 5 to 10 minutes. This will restore their delightful crunch before you fill them with whipped cream.
Are you ready to elevate your dessert game with these tips? Your homemade cream puffs will be the talk of the evening!
Serving Suggestions for Homemade Cream Puffs
Ideal occasions for serving cream puffs
Homemade cream puffs shine at gatherings like birthday parties, baby showers, or holiday celebrations. Their elegance and delightful taste make them a showstopper dessert! Picture this: a sunny afternoon picnic, where these light treats complement a sweet and savory spread. For added flair, consider creating a dessert table with different fillings like chocolate ganache or fruit-infused whipped cream.
Pairing with coffee or tea
These delicate pastries are best enjoyed with your favorite beverage. Whether it’s a smooth cappuccino or a fragrant Earl Grey tea, the rich flavors of cream puffs elevate the experience. Hosting friends for a cozy coffee date? Set out a platter of freshly made cream puffs; they’re perfect for sharing and delightfully simple to eat! For more pairing tips, check out Tea and Coffee Pairing Guide.
Time Breakdown for Homemade Cream Puffs
Preparation Time
In just 30 minutes, you can prep the dough and get everything ready for the oven. This includes mixing ingredients, piping the dough, and preparing the trays for baking.
Baking Time
These delightful homemade cream puffs will take about 1 hour and 15 minutes in the oven. The gradual baking process is key to achieving those perfectly puffed and crispy shells!
Total Time
Overall, from start to finish, you’re looking at a lovely 1 hour and 45 minutes to create these classic French desserts. Trust me; the effort is worth it when you take that first bite!
Nutritional Facts for Homemade Cream Puffs
Calories per cream puff
Each homemade cream puff contains approximately 116 calories. While they're a delightful treat, it's essential to enjoy them in moderation as part of a balanced diet.
Nutritional breakdown
A single cream puff boasts:
- Protein: 3g
- Fat: 7g (4g of which is saturated fat)
- Carbohydrates: 10g
These numbers provide a well-rounded view of this delightful dessert, combining sweetness with lightness. For more detailed insights on nutrition, you can check out resources like the USDA Food Composition Databases. Enjoy your cream puffs guilt-free!
FAQs about Homemade Cream Puffs
What are the common mistakes to avoid?
When making homemade cream puffs, consistency is key! A few common pitfalls include:
- Not measuring flour correctly: Use the spoon-and-level method for accuracy. If the dough is too dense, your puffs may not rise well.
- Opening the oven door too soon: Keep that door shut! A sudden change in temperature can cause them to deflate.
- Underbaking: Make sure your pastry shells are completely dry. If they feel heavy or soggy, they need more baking time.
Can I freeze cream puffs?
Yes! You can freeze the shells for up to a month. Just remember to fill them after thawing to maintain that delightful crunch. For storage tips, check out this guide on freezing pastries.
How do I keep cream puffs fresh?
To keep your homemade cream puffs at their best, serve them the same day for optimal flavor. If you have leftovers, store them in the fridge uncovered for up to three days—this helps avoid sogginess. For longer-lasting shells, opt to freeze them without filling!
Conclusion on Homemade Cream Puffs
Making homemade cream puffs is a delightful way to showcase your culinary skills and bring a touch of French elegance to your dessert table. With crispy shells and luscious whipped cream, they're sure to impress your friends and family. Enjoy this fun baking adventure and savor every bite!
Homemade Cream Puffs: Easy Indulgence for Every Occasion
Equipment
- Stand Mixer
- Cooling Rack
- Pastry Bag
- Plain Pastry Tip
- Star Pastry Tip
Ingredients
Pâte à Choux
- 1.25 cup water, divided
- 1 teaspoon granulated sugar
- 0.5 teaspoon kosher salt
- 0.5 cup unsalted butter, cut into 8 slices
- 1 cup all-purpose flour, spoon and leveled
- 4 large eggs
- 0.25 cup powdered sugar, for dusting
Egg Wash
- 1 large egg
- 1 tablespoon water, or milk
Whipped Cream
- 2 cups heavy whipping cream
- 0.5 cup powdered sugar, or granulated sugar
- 1 teaspoon pure vanilla extract
Instructions
Preparation
- Set the oven racks to upper-middle and lower-middle positions. Preheat to 425°F (218ºC). Line two sheet pans with parchment paper and set them aside.
- In a large heavy-bottomed saucepan, add 1 cup of water, sugar, salt, and butter. Bring to a boil over medium-high heat and stir until the butter fully melts, about 2 minutes.
- Turn off the heat and immediately add the flour. Vigorously stir with a large spoon (non-metal) until the flour is incorporated. Increase the heat to medium, and constantly stir until it clumps together, about 4 to 5 minutes.
- Transfer the dough to a bowl of a stand mixer fitted with a paddle. Slowly stir on low speed (setting 2) to cool to 130°F (54ºC) or just below, about 2 to 3 minutes.
- Add eggs one at a time, mixing on medium-low speed (setting 4) until each egg is fully incorporated, about 30 to 45 seconds per egg.
- Add a large plain tip to a piping bag. Add the dough to the pastry bag. Pipe onto the sheet pan, creating a 2-inch circular ball. Pipe at least 2 inches apart from each other.
- In a small bowl, whisk together one egg and 1 tablespoon of water. Brush the tops and sides of each dough ball with the egg wash.
- Place the sheet trays in the oven and bake for a total of about 60 to 70 minutes, reducing the temperature after 10 minutes.
- In a stand mixer fitted with the whisk attachment, whip heavy cream, powdered sugar, and vanilla extract until smooth peaks form, about 2 minutes.
- Add the whipped cream to a pastry bag fitted with a large star tip. Cut the baked shells in half and pipe the cream into the pastry bottoms.
- Sprinkle powdered sugar on top of each cream puff. Serve immediately, or refrigerate if not eating within one hour.

Leave a Reply