
Introduction to Brownies Red Velvet
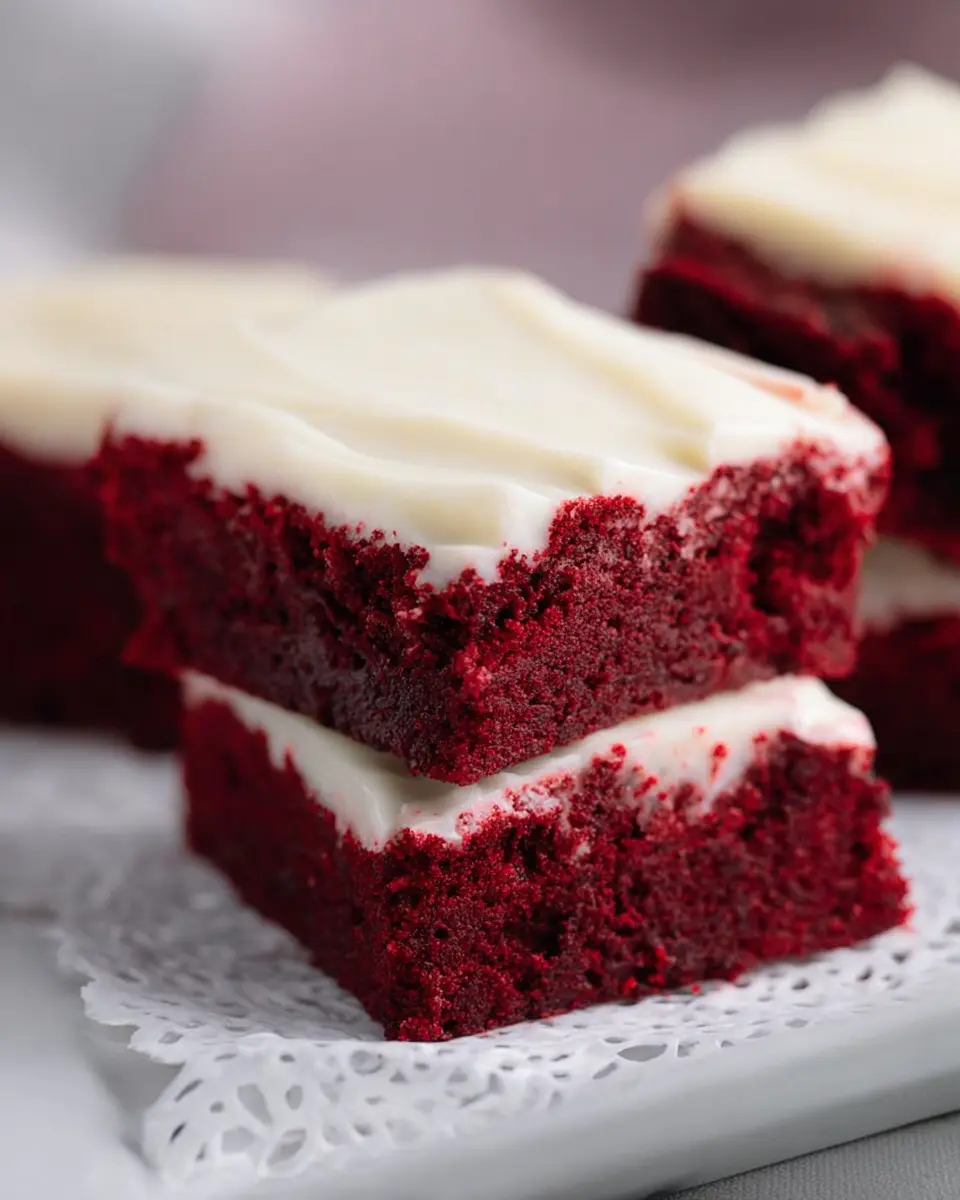
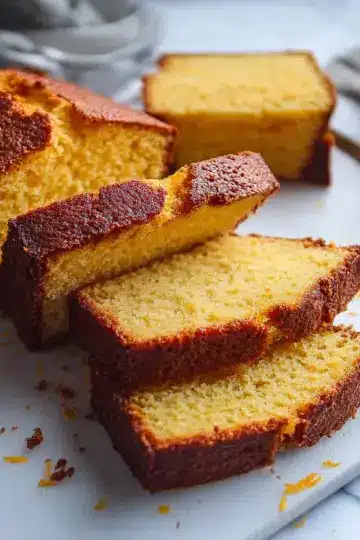
Have you ever tried a dessert that combines the richness of a brownie with the charming allure of red velvet cake? If you haven’t, then Brownies Red Velvet are a must-try! These delightful treats offer a unique twist on traditional brownies, presenting a velvety texture and a beautiful crimson hue that will impress anyone who sees them. Whether you're hosting a gathering or simply indulging yourself, these brownies are sure to elevate the dessert experience.
Why are Brownies Red Velvet a must-try?
What sets Brownies Red Velvet apart? The secret lies not only in their eye-catching color but also in their indulgent flavor. Infused with cocoa and a touch of buttermilk, these brownies boast a moist, tender crumb that's practically irresistible. Topped with a creamy frosting, they make for a decadent finish that balances sweetness with a slight tang.
Plus, making these brownies is a breeze! With just a handful of ingredients and a prep time of around 30 minutes, you can whip up a batch in no time. If you’re looking to impress guests or simply satisfy a sweet craving, there’s nothing quite like them. So grab your ingredients, and get ready to dive into the delightful world of Brownies Red Velvet! If you're new to baking or just looking for some inspiration, be sure to check out this recipe for a step-by-step guide to make your own.

Ingredients for Brownies Red Velvet
Essential ingredients for brownies
Creating the perfect Brownies Red Velvet starts with some classic ingredients that elevate the dish. Here’s what you’ll need:
- Chocolat au lait: 55 g (2 oz), haché – adds rich flavor to your brownies.
- Beurre non salé: 125 ml (½ tasse), coupé en cubes – for that moist and fudgy texture.
- Oeuf: 1 – the binder that gives structure.
- Cassonade: 180 ml (¾ tasse), tassée – to bring in sweetness and a hint of caramel.
- Colorant rouge liquide: 28 ml (1 oz) – this is where your brownies get their signature red hue!
- Sel: 1 ml (¼ c. à thé) – a dash of salt enhances the overall flavor.
- Farine tout usage: 125 ml (½ tasse), non blanchie – the base that holds everything together.
Key ingredients for the cream cheese frosting
To give your Brownies Red Velvet that indulgent finish, you can whip up a luscious cream cheese frosting. For this, make sure to have:
- Fromage à la crème: 115 g (4 oz), ramolli – this creamy base is essential for a smooth texture.
- Beurre non salé: 30 ml (2 c. à soupe), ramolli – adds richness and creaminess.
- Sucre à glacer: 125 ml (½ tasse) – for that sweet, fluffy finish you can’t resist.
In no time, you’ll have delightful brownies that taste as good as they look! Looking for more tips? Check out these frosting techniques and elevate your dessert game!
Preparing Brownies Red Velvet
Making Brownies Red Velvet is an exciting journey into the world of delicious baked goods. Whether it's for a birthday celebration, a cozy gathering, or simply a treat for yourself, let's walk through each step together to ensure they turn out perfectly!
Gather your ingredients
First things first, let's get organized. Here’s what you need for your Red Velvet Brownies:
- 55 g (2 oz) milk chocolate, chopped
- 125 ml (½ cup) unsalted butter, diced
- 1 egg
- 180 ml (¾ cup) packed brown sugar
- 28 ml (1 oz) liquid red food coloring
- 1 ml (¼ tsp) salt
- 125 ml (½ cup) all-purpose flour
For the cream cheese frosting:
- 115 g (4 oz) cream cheese, softened
- 30 ml (2 tbsp) unsalted butter, softened
- 125 ml (½ cup) powdered sugar
Once you have all your ingredients, you're ready to start baking!
Preheat your oven
Before diving into mixing, preheat your oven to 180 °C (350 °F). This is a crucial step as it ensures the brownies bake evenly. While the oven heats up, you can prepare your baking pan. Grease a 20 cm (8-inch) square pan and line it with parchment paper, allowing some overhang for easy removal later.
Melt chocolate and butter
Now comes the fun part! In a heatproof bowl, melt the chopped milk chocolate and butter together. You can use a double boiler for this, or simply pop them in the microwave in short bursts, stirring in between. Once melted, set it aside to cool slightly.
Whisk together wet ingredients
In a separate bowl, whisk together the egg, brown sugar, red food coloring, and salt until the mixture is smooth and combined. This is where the vibrant color of the Brownies Red Velvet starts to emerge! Carefully incorporate the chocolate-butter mixture into this blend to create a rich batter.
Combine dry ingredients and mix
Now, add the flour to the wet mixture. Gently fold it in until just combined. Be cautious not to overmix, as this can create dense brownies. Your batter should be luscious and slightly thick.
Bake the brownies
Pour the brownie batter into the prepared pan, smoothing it out with a spatula. Bake for about 25 minutes, or until a toothpick inserted in the center comes out with a few moist crumbs. Be careful not to overbake; you want that fudgy texture to shine!
Prepare the cream cheese frosting
While those brownies are cooling, whip up your frosting. In a bowl, cream together the softened cream cheese, butter, and powdered sugar until it's light and fluffy. This will give you that creamy layer of Brownies Red Velvet that everyone loves.
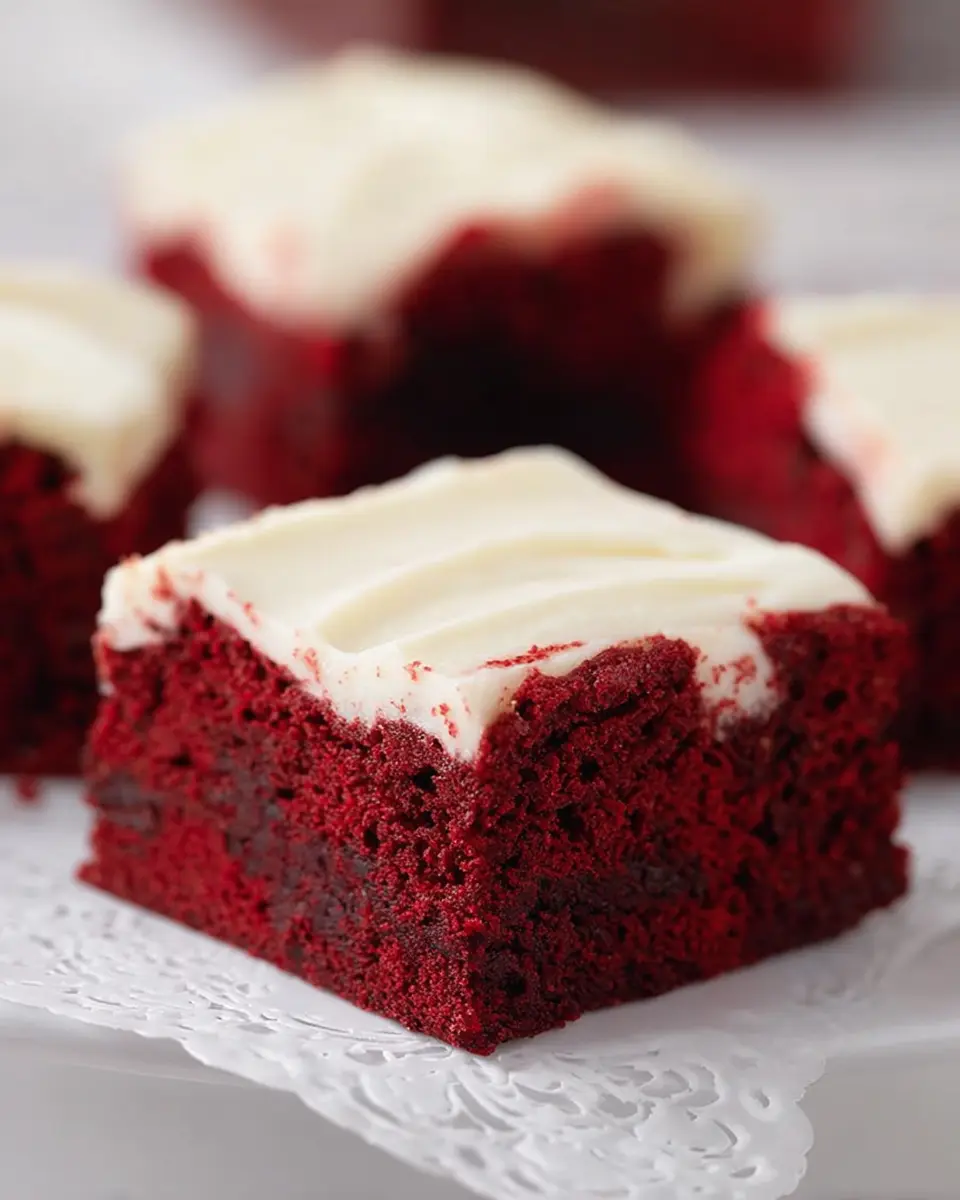
Frost and cool before serving
Once your brownies have completely cooled, generously spread the frosting on top. If you’re feeling fancy, you can even decorate with chocolate shavings or sprinkles. Allow your frosted brownies to chill in the refrigerator for an hour — this helps the frosting set beautifully.
Now you’re ready to slice them up and treat yourself or impress your guests! Enjoy your delicious homemade Brownies Red Velvet, and feel free to share them with friends (if you want to, of course!).
Variations on Brownies Red Velvet
Gluten-free Red Velvet Brownies
Craving that rich, decadent flavor of brownies red velvet without gluten? No problem! You can easily substitute regular flour with a gluten-free blend. Make sure to select a high-quality mix that contains xanthan gum to maintain that chewy texture we all love. You can also try almond or coconut flour for an added dose of nuttiness. Just remember to adjust the quantities since gluten-free flours can behave differently in baking. We promise—it’s just as delicious!
Vegan Red Velvet Brownies
Date night or a cozy weekend treat? You can whip up a vegan-version of brownies red velvet! Instead of eggs, try using unsweetened applesauce, mashed bananas, or even flaxseed meal mixed with water as a binding agent. Replace butter with coconut oil or vegan butter, and opt for dairy-free chocolate for that rich cocoa flavor. With these simple swaps, you can indulge guilt-free while still enjoying that luscious red velvet taste! Want to explore more vegan treats? Check out this vegan baking guide.
Baking notes for Brownies Red Velvet
Temperature tips
When baking your Brownies Red Velvet, achieving the right temperature is critical for that perfect texture. Make sure your oven is fully preheated to 350°F (180°C). Always position the rack in the center in order to ensure even baking. If your brownies finish baking too quickly and become dry, consider investing in an oven thermometer to check your oven's accuracy, as each oven can behave slightly differently.
Substitutions and alterations
Flexibility is key when it comes to baking! Here are some easy substitutes you can try:
- Butter: Swap in coconut oil or applesauce for a dairy-free alternative.
- Flour: For a gluten-free version, use almond flour or a gluten-free blend.
- Coloring: If you prefer, natural food colorings can replace traditional dyes for a more wholesome touch.
Experiment and find what works best for you; every kitchen is unique! For additional tips on ingredient substitutions, check out resources like The Spruce Eats.
Serving suggestions for Brownies Red Velvet
Pairing with ice cream
Treat your taste buds by pairing your Brownies Red Velvet with a scoop of vanilla or cream cheese ice cream. The richness of the brownies compliments the creaminess of the ice cream, creating a delightful dessert experience. For an extra touch, drizzle some chocolate or white chocolate sauce on top and sprinkle crushed nuts or fresh berries for added flavor and texture. You won’t be able to resist this heavenly combination!
Decorating ideas for special occasions
Elevate your Brownies Red Velvet by decorating them for special occasions. Consider using a simple cream cheese frosting and adding seasonal toppings like sprinkles, edible glitter, or fresh fruit. For a festive touch, pipe the frosting into shapes or create a beautiful swirl. You can even layer the brownies with layers of frosting for a dramatic, multi-tiered effect. These embellishments will not only make your brownies look stunning but also add to the overall indulgence. Whether it's a birthday or a festive gathering, these decorative touches will impress your guests and make the dessert memorable.
Tips for Making Perfect Brownies Red Velvet
Checking for Doneness
When baking your Brownies Red Velvet, the key to perfection lies in knowing when they're done. About 25 minutes in the oven should do it, but it’s wise to start checking a couple of minutes earlier. Insert a toothpick into the center; it should come out with a few moist crumbs clinging to it, but not wet batter. If it comes out completely clean, you might risk a dry brownie!
Storing for Freshness
To keep your delicious Brownies Red Velvet fresh, store them in an airtight container at room temperature for up to two days. For longer-lasting treats, consider freezing them! Just wrap individual squares in plastic wrap and place them in a freezer-safe bag. When you’re ready for a sweet indulgence, let them thaw at room temperature for a few hours. Trust me, they will taste just as amazing!
Time Details for Brownies Red Velvet
Preparation Time
The prep time for these delightful Brownies Red Velvet is about 30 minutes. This includes gathering your ingredients and mixing them together. A little organization goes a long way!
Baking Time
Once your batter is ready, simply pop it in the oven for 25 minutes. This is the perfect window to set your kitchen aromas to work their magic.
Total Time
In all, you're looking at around 1 hour and 55 minutes for everything from prep to chilling. This includes baking and some cooling time, ensuring that your brownies are perfectly set before serving. Perfect for any occasion, these brownies will have everyone coming back for seconds!
For more delicious recipes, check out Food Network for inspiration, or explore techniques at Serious Eats.
Nutritional Information for Brownies Red Velvet
Calories per square
Each delectable square of Brownies Red Velvet has approximately 150 calories. While they might be a sweet indulgence, they fit nicely into your treat rotation without derailing your day.
Sugar content
These brownies contain about 12 grams of sugar per square. If you’re keeping an eye on your sugar intake, savoring one as an occasional treat is a delicious way to satisfy your cravings.
Dietary considerations
Worried about dietary restrictions? The Brownies Red Velvet recipe is vegetarian and nut-free, making it a versatile option for gatherings. However, if you need to avoid gluten, consider using a gluten-free flour substitute. Always remember to check ingredient labels to align with specific dietary needs.
For more detailed nutritional insights, you can visit the USDA's FoodData Central for comprehensive nutritional data. Enjoy your baking!
FAQs about Brownies Red Velvet
How can I achieve the perfect texture?
To get that delightfully fudgy texture in your Brownies Red Velvet, remember not to overbake. Aim for a slightly underbaked brownie, as the center should feel just set but not dry. It’s okay if a toothpick comes out with a few moist crumbs—this is a sign of that gooey goodness you’re after! Also, letting the brownies cool completely before cutting can help achieve clean edges and the right consistency.
How long can I store the brownies?
You can store your delicious Brownies Red Velvet in an airtight container at room temperature for up to 2 days. If you want them to last longer, refrigerate them for up to a week. For extended freshness, consider freezing them! Wrap individual squares tightly in plastic wrap and place them in a freezer-safe bag. They’ll keep for up to three months!
Can I make these brownies ahead of time?
Absolutely! Making Brownies Red Velvet ahead of time is a fantastic idea for busy schedules. Bake them a day or two in advance and refrigerate. Just be sure to frost them just before serving for that fresh-from-the-oven experience. Want more tips? Check out this helpful guide on brownie baking for further insights!
Conclusion on Brownies Red Velvet
These Brownies Red Velvet are a delightful twist on the classic favorite, perfect for special occasions or when you just want a sweet treat. Their rich flavor and eye-catching color make them not only delicious but also visually appealing. Try making them for your next gathering—you won't regret it!

Brownies Red Velvet
Equipment
- Oven
- Mixing Bowls
- Whisk
- Square baking pan
- Parchment Paper
Ingredients
Brownies
- 55 g milk chocolate, chopped
- 125 ml unsalted butter, cubed
- 1 egg
- 180 ml packed brown sugar
- 28 ml liquid red food coloring
- 1 ml salt
- 125 ml all-purpose flour, unbleached
Frosting
- 115 g cream cheese, softened
- 30 ml unsalted butter, softened
- 125 ml icing sugar
Instructions
Brownies
- Place the oven rack in the center and preheat the oven to 180 °C (350 °F). Butter and line a 20 cm (8 inch) square baking pan with parchment paper, leaving an overhang on two sides.
- In a bowl, melt the chocolate with the butter over a double boiler or in the microwave. Mix and let cool.
- In another bowl, whisk together the egg, brown sugar, food coloring, and salt until smooth. Add the chocolate mixture and flour. Mix until smooth. Pour into the pan.
- Bake for about 25 minutes or until a toothpick inserted in the center comes out with a few crumbs. Let cool completely before frosting or freezing.
Frosting
- In a bowl, cream the cream cheese with the butter and icing sugar using a whisk. Spread the frosting over the cooled brownie. Refrigerate for 1 hour. Remove from the pan and cut into 25 squares. Let sit before serving.
- If the edges seem more cooked, trim them before cutting the brownies. They can be stored for 2 days in the fridge.

Leave a Reply